In alcohol based markers, like the (BRAND NEW!) Stampin’ Blendabilities, the color dye or pigment is suspended in alcohol versus water, like most washable/non-permanent markers. They are not water soluble and are generally permanent.
Unlike watercolor markers, alcohol markers blend really well. They blend by layering strokes of color over one another until you achieve the desired effect. You can add shading, highlighting, color change, an ombre effect & all with the ease of alcohol marker coloring. They don’t create streaking, they don’t tear the paper, they dry quickly so it is easy to see the final color result.
Now you know a little bit more about alcohol markers, but why do you need them? Do you love outline image stamps? Or creating backgrounds that make your image lifelike? Or love the ombre effect? Want to color on embellishments and the color not wear off? That’s why you need Blendabilities.
With Blendabilities, you can create the desired coloring effects of an alcohol marker at half the price. They come in at $11.95 for a pack of three (3) same color markers, in three shades, a light, dark and medium. Currently, we are offering Cherry Cobbler, Pumpkin Pie, Daffodil Delight, Coastal Cabana, Old Olive, Rich Razzleberry, a skin tone assortment of six shades, and a color lifter. Again, each of these colors listed is a three pack of a light, medium and dark marker.
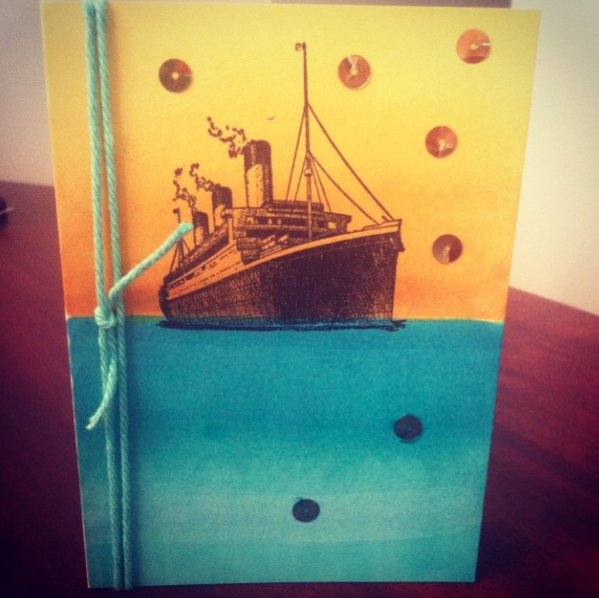
So below, I bought the Daffodil Delight and Coastal Cabana marker packs. I started with the darkest shade along the horizon and then blended the colors outwards with graduated horizontal lines moving from dark to medium to light. At the outermost parts, I layered approximately 20 strokes of color to achieve this look.
Blending: They key is to continue coloring over the existing line, while still coloring on the area below the line as well (think half on the line of color, half off). This blends out the harsh lines created when changing colors.
Strokes: Think brush strokes. Light, feathery strokes. What does that mean? When you start coloring, make solid contact with the paper. As you continue with the same line and come to the end of the stroke, you will lift the marker upwards like a paintbrush flick. This makes the ink darkest at the starting point of each stroke and lighter where it ends. This is feathering- flick the marker upwards towards the end of each stroke. The colors will appear well blended because you are layering less ink onto the lightest color and more ink onto the shadow areas. You can use reverse strokes as needed in areas going from light to dark.
Embellishments: Can you see the sequins? They are the gold sequin trim, cut up and colored with Blendabilies. They now coordinate with the background to which they are affixed.
Paper: This is important- USE WHISPER WHITE OR VERY VANILLA. You need to use Stampin’ Up brand cardstock with these Stampin’ Up markers if you want the color to blend well. They were designed and tested together, and the Blendabilities work really well with the glossy properties of the paper. It allows the colors to flow smoothly. USE Stampin Up Whisper White Cardstock. You can use colored card stock, but because it is not glossy, you will not have the same blending effect.
Now that you know ALL about Alcohol Markers, Blendabilities, you are ready to try them out. Here’s a good starting point.
Happy Crafting!
In addition, there are some great ongoing deals that you won’t want to miss out on.


